Friday, September 30, 2016

Black

The first thing I did today was to clear the path for the car.This giave me the chance to push the car to the paint booth.
 Here we are entering the paint booth.
 I then covered the car with paper and plastic to protect it from overspray.
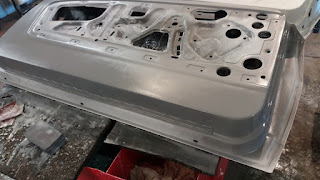
 Then I used the stand for the doors and hung them on it.
 Then the doors were covered partially with paper.
 We then dusted the car of and degreased the car. We prepared the paint and started painting on the passenger compartment and trunk with semi gloss black acrylic paint.
 And a other view with the doors. After the painting was done with dried the paint at 60° Celcius.
 Then we removed all the paper plastic and tape.
We are now ready for the next step.

Thursday, September 29, 2016

Masking tape.

Today we started with the preparation for paint.
Since I have not yet access to the paint booth I started to apply masking tape around the edges of the  area that I will paint first.
 The passenger compartment and the trunk gets the honor to be painted first.
They will be painted a semi gloss black.
 So everything els needs to be covered to protect against overspray. Otherwise I will have to sand again and I don't want to do that.

Wednesday, September 28, 2016

Wheels

Today I finished up on the stand for the trunk.
These are all the stands I made. Including some hooks. While painting you will see how they are used.
 And Here are the wheels.
 Here I'm busy welding the wheels in place. This I do to make it able to move the car to the paintbooth without the use of the cart used previously it would be to much trouble to paint the car.
And Here it is the car has got wheels again after so long.

Tuesday, September 27, 2016

Support for the hood

Today I continued with the fabrication of some support to suspend some part on for painting.
 If you look on the picture there are some long poles that are the ones for the hood.
The bar with the hooks is also for the hood. And I already started with the fabrication of the stand for the trunk.

Thursday, September 22, 2016

Stand for the doors.

Today I made a stand to hang the doors on when they are painted.
Both door can be suspended on them. Since the doors need to be painted in 2 colors , black on the inside and gray on the outside the space between them is not that large.
I now have to make a stand for the trunk lid and hood.
But that will be for another day and week.

Wednesday, September 21, 2016

small parts

Today I sanded some small parts before painting.
 Like there are the hinges of the hood and of the glove box,
 The battery tray, the covers around the coil springs and the plate to which the latch of the hood is mounted.
 The hinges of the trunk.
 And then I repaired the plate which hold the rear leafspring in place, there were some plate welded on and with the acetylene torch I removed most of it.
The rest was grinded away with a grinder. The plate was then straightened and a piece of plate was welded in place.
 Now all it needs is some paint and its ready to mount.
 Next I started with fabricating some stands to which the fenders, doors, hood, trunk lid and other parts can mounted. This will help to get the parts painted all at the same time.
Here one front fender was mounted to look if it fits. This stand makes it possible to paint the inside and outsied at the same time.

Tuesday, September 13, 2016

and they are finished

So today I continued sanding on the doors.
 I started sanding the driver side door, the character line that was wrong.
After sanding I applied a coat of primer and started sanding the other door.
 As soon as the other door was done I switched to the drivers door again and sanded the primer that I applied earlier.
Now the door are sanded with 1200 grid on the outside/
 I then flipped the doors and started sanding the inside of the doors.
 This is one door after I applied a coat of primer.
 And the sanding continues with the other door. As you can see in the picture there are some areas where the black paint is coming trough the filler. Its because of this black paint that i apply a coat of primer. Its is not as resistant to thinner as normal lacquer.
 Here the last door is coated with some primer.
 After the primer has dried I gave them a light sanding with 1200 grid paper.
This means that we now can continue with the next step.
A few small parts need some light sanding an then...

Monday, September 12, 2016

The doors

Its a new week and the sanding continues.
First I finished sanding the fender with 1200 grid.
Then I started on the driver side door.
 While sanding I noticed an error in the character line. The brown stuff you see is a bondo for fine repairs. One layer was applied and allowed to harden.
 In the mean time i sanded the other door.
On this door I had to apply a large area with primer. I then sanded the bondo on the other door and had to apply an other thin coat of bondo.
Tomorrow i will sand the the doors again an then do the inside of the doors.

Thursday, September 8, 2016

Learned a new trick.

Well after 30 year of working on cars I learned a new trick.
But first things first.
I started with sanding the fender from yesterday with 1200 grid paper.
 And then I Started on the other fender.
But as you can see in the picture I had made an error while spraying the filler.
I got a massive runner.
 So I started sanding the inner edges.
 And next I i continued with the top of the fender like I did yesterday. But there is that massive runner. The trick I learned from a coworker is with the blade of a boxcutter scraping the runner away until it is flat with the rest of the surface and then thoroughly sand the area with sandpaper until there is nothing more to see and feel.
 And voilĂ  away is the runner.
 Then the rest of the fender is sanded.
 And a coat of primer is applied on those surfaces that were sanded trough.

Wednesday, September 7, 2016

The Hood is finished

And the sanding continues.
 The hood is now completely finished.
This means that I can go on to the next part.

 The fender. I started with the driver side fender and first sanded the edges.
 Then the top of the fender.
 The top of the side of the fender.
 And the complete fender.
Some edges I sanded trough the primer and they were covered with primer in a can.
Tomorrow I will start and sand those parts with a 1200 grid paper and then...

Tuesday, September 6, 2016

Can you see the difference?

Today I continued sanding the hood.
After a while I had one half done. Can you see the difference?
 A while later the other half was done. And I had to touch up some parts with the spray can primer.
 I then turned the hood upside down and spryed some sanding guide coat.
 And then I started sanding again. At the end of the day half of the underside is sanded.
The rest will be for tomorrow. And after I sanded the hood I will continue with the last for big parts.