Today we transported the car on a trailer to its new location.
So for me this is like saying goodbye to a car which I grow to love.
I sure hope to see it again.
Wednesday, March 1, 2017
Tuesday, February 28, 2017
Ready for the next
Today together with my colleagues we finished the car.
The last part that has been repaired is polished.
 Its looking good.
 So now the car is ready for the next stage.
We will have to move the car to a garage where they are able to do the last things before inspection.
Setting up the front suspension geometry.
Checking the brakes for air trapped in the lines.
Aligning the head lights.
checking the oil levels of the transmission and do an engine tune-up.
So for now I'm signing off.
The last part that has been repaired is polished.


We will have to move the car to a garage where they are able to do the last things before inspection.
Setting up the front suspension geometry.
Checking the brakes for air trapped in the lines.
Aligning the head lights.
checking the oil levels of the transmission and do an engine tune-up.
So for now I'm signing off.
Monday, February 27, 2017
Turn signals.
Today I went to the Mustang Garage to get a new flasher relay.
Once I got home again I installed it instead of the one in place and now the turn signals are working. So the instrument cluster could be bolted back in place.
 Next I installed the carpets on the floor. The ones with the pony on.

I gathered all the last materials and put them in the trunk.
 I then made a picture from above. And its a mighty fine car.
 Tomorrow we will have to do some final polishing and its ready to go to its next station.
Once I got home again I installed it instead of the one in place and now the turn signals are working. So the instrument cluster could be bolted back in place.


I gathered all the last materials and put them in the trunk.


Saturday, February 25, 2017
The last parts.
Today I started with the removal of the paper and masking tape. And the racing stripes are looking good.
 Then I went for the search of the wires that connect to the reserve light switch. And finally I found them.
I made them longer with some wires at hand and warped them in tape.
 In order to be able to connect the wire tor the switch I had to jack-up the care ones more. Then I was able to make the connection.
While the car was jacked up and me laying under it, I tightened up the handbrake cable and the clutch cable.
 The driver side door is not closing like it should. The gap is to big and the locking pin can not move any more to the inside. So I made a change to the catcher. On my mill I elongated the 2 mounting holes. Now I'm able to mount it more inside and the gap is less then before.
 Next I made a mold for the Mustang letter. And then installed the letters on the car.
 The reverse lights are now working. The hazard light are flashing. The brake lights were not working properly. One side did not burn. After some searching I found that the connector to the light was broken. One wire was broken off. Some soldering and now they work.
Only the flasher lights are not working and I suspect that the flasher relay is broken.
 I also installed the windshield wipers and cleaned the windows.
 There are numerous other things I did but have forgotten to mention.
In other words the car is almost finished.
All that rests is making the turn signals work, installing the instrument cluster.
And the repaired paint job needs some polishing.
If all goes well .....

I made them longer with some wires at hand and warped them in tape.

While the car was jacked up and me laying under it, I tightened up the handbrake cable and the clutch cable.


Only the flasher lights are not working and I suspect that the flasher relay is broken.


In other words the car is almost finished.
All that rests is making the turn signals work, installing the instrument cluster.
And the repaired paint job needs some polishing.
If all goes well .....
Friday, February 24, 2017
Racing stripes.
Today I first removed the paper around the area that was painted yesterday.
Then I started with the layout of the racing stripes that were on the original car.
I starting with putting some fine edge masking tape around the outlines.
 When the outlines were right I taped the whole car with paper to keep the overspray to a minimum.
 Next the space between the making tape was sanded with a fine gray scotch pad. Then everything was wiped down with a silicone remover and the parts are tack raged. And then the paint was applied with a small paint gun with a fine needle. This was done to keep the paint layer thin and prevent to thick edges.
 While the paint was drying I started with the preparation of the letters Mustang.
They first were cleaned with aceton.
 Then a special double sided tape designed for body work, was taped to the backside of the letters.
 And then a tedious work of cutting out the edge of the letters could start. With the use of a razor sharp x-acto knife and a scalpel.
 After a while this is the result. These letters are ready to glue back to the car.
 But first I will have to make a mold.
Then I started with the layout of the racing stripes that were on the original car.
I starting with putting some fine edge masking tape around the outlines.


They first were cleaned with aceton.


Thursday, February 23, 2017
Checking the electrics.
Today I started with checking the electrics.
After testing everything I have a few bugs.
The front fog lights were not working but that got sorted out by changing wires. I took the wrong ones.
The Turn signals are not working and the left brake light is not working.
I also noticed that the windshield wiper mechanism is hitting something. and I already found out what seems to be the problem.
The revers lights are not working and that has to do with wires not connected to the transmission switch.
So I started looking under the dashboard for some wires but at a given moment had to stop.
My colleagues are at the point to tape of the car for a spot repair.
That spot repair was necessary because while removing paper from the freshly painted car I pulled some paint with it.
 On the picture above you can see the spot that is been repaired.
 And now it is painted .
It now has tor dry until tomorrow before I can continue.
After testing everything I have a few bugs.
The front fog lights were not working but that got sorted out by changing wires. I took the wrong ones.
The Turn signals are not working and the left brake light is not working.
I also noticed that the windshield wiper mechanism is hitting something. and I already found out what seems to be the problem.
The revers lights are not working and that has to do with wires not connected to the transmission switch.
So I started looking under the dashboard for some wires but at a given moment had to stop.
My colleagues are at the point to tape of the car for a spot repair.
That spot repair was necessary because while removing paper from the freshly painted car I pulled some paint with it.


It now has tor dry until tomorrow before I can continue.
Wednesday, February 22, 2017
Reflectors
Today my Co-workers continued with perfecting the car.
 And they do a fine job.
In the meantime I did some work to.
I started with the trunk. I connected the leads from the shock absorbers to the air valve. They can be pumped up with some air pressure. I need to figure out how much it needs to be. 25-200 psi? Bar or something else.
Near the taillights there were also some connectors that were loose. Mainly ground leads.
 I made a connection with the taillights the reverse lights and the chassis.
 Then I left the trunk and made some brackets for the the rear reflectors. They are mandatory in Belgium to pass Technical inspection.
They are cut from a piece of alu plate and the reflector is glued to it with some double sided tape.
 The brackets are mounted to the bolts that stick out from the bumper mount.
 I think they are rather nice. And they can easily be removed if necessary.

In the meantime I did some work to.
I started with the trunk. I connected the leads from the shock absorbers to the air valve. They can be pumped up with some air pressure. I need to figure out how much it needs to be. 25-200 psi? Bar or something else.
Near the taillights there were also some connectors that were loose. Mainly ground leads.


They are cut from a piece of alu plate and the reflector is glued to it with some double sided tape.


Tuesday, February 21, 2017
Touching up
Today I got help from 2 of my Co-workers.
They are here to finish the paint job. Sanding out dust spots and Polishing those sanded spot to get the car perfect.
 The picture above you are able to see the dust spots that have been sanded.
 This picture shows how is is sanded with 1500 grid paper before sanding once more with 6000 grid paper. After that last sanding the paint is polished with a buffer wheel. These Co-workers are professionals and know what they are doing.
In the mean time I did a few other jobs.
First I prepared the Mustang lettering to go on the side of the car. The old glue is been removed. Then they are washed with a seal and bond remover and finally they are washed with acetone to remove that last spot of glue.
 Later I will apply new double sided tape.
Then I had to make an adapter for putting air in the tires.
 At work I was given an adapter to inflate big truck tires. That adapter was modified to work together with a normal tire connector. Then that piece was connected to my tire pistol.
It was a lot of work with several tryouts to get it functioning properly.
 With this modified tire pistol I could blow some much needed air in the tires. There was almost no air present. I inflated them to 2 Bar for now.
That was it for today. Tomorrow we will continue.
They are here to finish the paint job. Sanding out dust spots and Polishing those sanded spot to get the car perfect.


In the mean time I did a few other jobs.
First I prepared the Mustang lettering to go on the side of the car. The old glue is been removed. Then they are washed with a seal and bond remover and finally they are washed with acetone to remove that last spot of glue.

Then I had to make an adapter for putting air in the tires.

It was a lot of work with several tryouts to get it functioning properly.

That was it for today. Tomorrow we will continue.
Monday, February 20, 2017
Screen wash reservoir
Today I did do a few things.
First I finished the screen washer reservoir I made earlier. The foam rubber strips are to protect the paint and to prevent that it is rattling in its place.
 Then the box was mounted in its place and secured by some bolts under neath the car. The filler piece together with a rubber hose is mounted. And th tube connecting the reservoir with the pump is installed.
 Then 2 pieces of rubber hose were cut to put around the securing studs in the hood. These tubes are cut to a specific length witch I became by trail and error.
 They keep the hood in place and aligned with the top of the fender and grill. The hood was hanging a little bit low on one side.
First I finished the screen washer reservoir I made earlier. The foam rubber strips are to protect the paint and to prevent that it is rattling in its place.


Saturday, February 18, 2017
A productive day.
Today I got a lot done.
First I installed the taillights .
 Then the bumpers were prepared.
The inside of the bumpers were painted with a galvanic paint to protect them from rusting .
 I then looked for all the necessary hard ware to mount them in place. I also made some rubber washers to mount between the body and the body of the car.
This I did t protect the paint and plug the holes in the body for rain to enter.
 Then it's obvious that the bumpers were installed and the license plate light was mounted and connected to the wire loom.
The next thing was to mount the front bumper in place. But first I had to do a little modification to the brackets of the front bumper. In order to get them at the same location I had to elongate the 2 mounting holes.
Then the headlights were installed in the car and they got a rough adjusting . Later on these headlights will get properly adjusted at an other location. I do not have the necessary tools for that.
So the headlight covers came on next.
And next the hood was taken care off. The front chrome trim near the edge of the hood was installed. Then the securing pins for the hood were installed and aligned and the caver plates for the hole in the hood got its protection cover riveted in place with stainless rivets.
And finally the chrome FORD letters were installed back on the car.
 Looking at the front of the car and the rear it more and more resembles a proper Mustang.
 This next coming week some more nice things will be done to the car.
First I installed the taillights .

The inside of the bumpers were painted with a galvanic paint to protect them from rusting .

This I did t protect the paint and plug the holes in the body for rain to enter.

The next thing was to mount the front bumper in place. But first I had to do a little modification to the brackets of the front bumper. In order to get them at the same location I had to elongate the 2 mounting holes.
Then the headlights were installed in the car and they got a rough adjusting . Later on these headlights will get properly adjusted at an other location. I do not have the necessary tools for that.
So the headlight covers came on next.
And next the hood was taken care off. The front chrome trim near the edge of the hood was installed. Then the securing pins for the hood were installed and aligned and the caver plates for the hole in the hood got its protection cover riveted in place with stainless rivets.
And finally the chrome FORD letters were installed back on the car.


Monday, February 13, 2017
Back at the shop.
Early this morning I went to work to prepare the car fo its transport back to my shop.
All paper and tape was removed the battery reconnected and the car put on the trailer again.
 Then it was a short drive and unload the car back in the shop.
I will now give it some time so the paint can fully harden, and I have to repair my own car.
All paper and tape was removed the battery reconnected and the car put on the trailer again.

I will now give it some time so the paint can fully harden, and I have to repair my own car.
Saturday, February 11, 2017
Painting
Early This morning we, myself and my colleague, went to the paint booth and started with the sanding of the area around the rear taillight.
Then we made the floor completely wet with water. and then started dusting of the car with air. Next degreasing the car and tack ragging it to remove all dust.
Then it was time to paint the car.
First the base caot.
 Here the car is fully painted with base coat and drying.
 Then the first layer of varnish was applied. A light coat.
 And then the final coat of varnish.
 Well I'm pleased with the result.
Now we will have to wait for the car to dry.
Then we made the floor completely wet with water. and then started dusting of the car with air. Next degreasing the car and tack ragging it to remove all dust.
Then it was time to paint the car.
First the base caot.


Now we will have to wait for the car to dry.
Friday, February 10, 2017
Preparing for paint
This morning I started with removing the paper from the car and preparing it for the move.
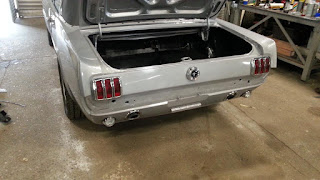
 Above a look from the front, below a look from the rear.
 Then it was time to get the truck and trailer and load the car on the trailer. In driving the car on the trailer I noticed that the clutch needs some adjusting.
 Then it was time for the drive to the paint booth.
 The car was driven to its place and then the preparation began. Sanding the whole car ones more. Then a throughly cleaning with air to remove all the dust and then we were able to tape the car off again.
 All that preparing was done by me and 2 coworkers.
 At the back side near the taillight where we made the repair the paint was working up. So we painted it with some clear to seal it off.
 This part will need some more sanding tomorrow with a scotch pad before we can start painting.


Subscribe to:
Posts (Atom)